Booking in a new Service customer
After using the search fields to find your customer or their vehicle you may still be unable to find them, in this case we will need to add them as a new client.
You can now simply add a new client and service vehicle by simply using the quick add function located within the same screen as the booking manager.

Simply fill in the details, if the client is not in the system, you can add a new client by clicking the ‘...’ located next to ‘Surname’ field which will take you to the client lookup screen.
Below we will provide detail on how to add clients from the client lookup screen and other methods on how to add service vehicles.
To add a new client you will need to add a new vehicle; this is done from the Service Control Centre tab and then the vehicle tab.
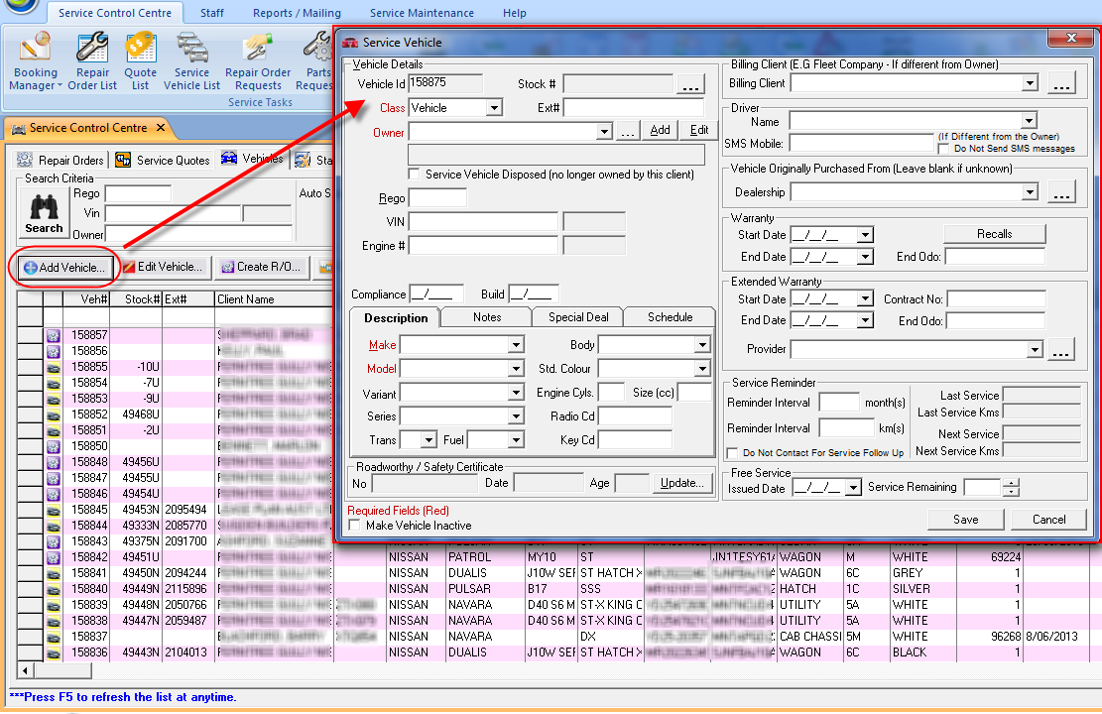
Field Descriptions
Vehicle Id | This is the Stock Number Service allocates a vehicle |
Class | Is the type of service vehicle (Caravan, Boat) etc |
Owner | Is the Client who owns the Vehicle* |
Rego | Registration of the Vehicle |
Vin | Vin Number of the Vehicle |
Engine # | Engine Number of the vehicle |
Compliance/Build | Compliance/Build Date of the Vehicle |
Make (Mandatory Field) | Make of the Vehicle |
Model (Mandatory Field) | Model of the Vehicle |
Variant | E.g. Coromal = PopTop |
Series | |
Body | Body type of the vehicle = 1 Axle ect. |
Fuel | What Fuel type the Vehicle Takes |
Std Colour | This is the colour of the Van e.g. Red Not the Factory Name of the colour |
Billing Client | The Company/Person Paying the Bill (this is not always the driver) |
Driver Name & SMS Mobile | The Name of the driver and their mobile number (used for text messaging) |
Dealership | Where the vehicle was first purchased |
Warranty | These dates are used to see if the Vehicle is still under warranty either by date or the vehicles odometer |
Extended Warranty Dates | This is the same as the Warranty fields |
Extended Warranty Provider | Your customers Warranty maybe provided by a third party |
Service Reminder (Last Service) | This field is auto filled if you are ticking in a repair order “this is a service” |
Reminder Interval | This will then create a reminder according to this date |
Free Service | Fill in details if a free service is offered to the client. |
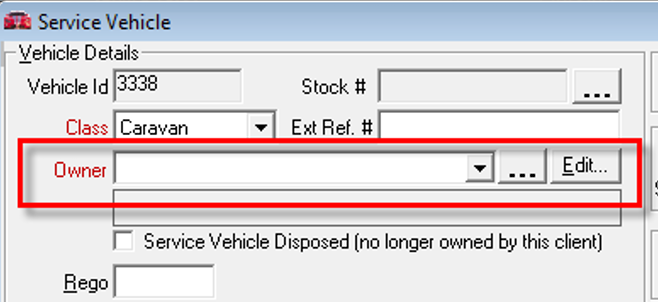
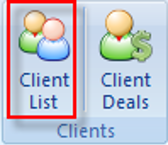
*Client who owns the Vehicle, to add a new client you can click the 3 dots in the Add Vehicle screen or go to the Client List button on you tool bar.
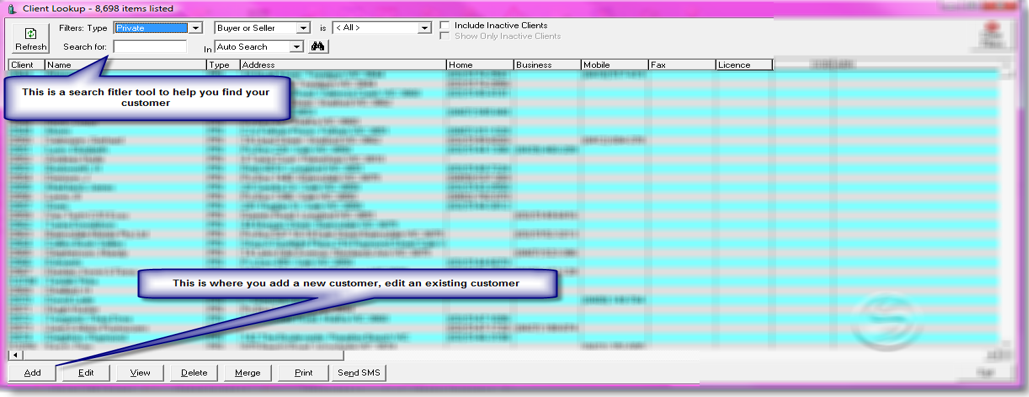
Once you have selected the correct customer, it will take you to a booking screen. This screen is shown below with captions to explain the features.
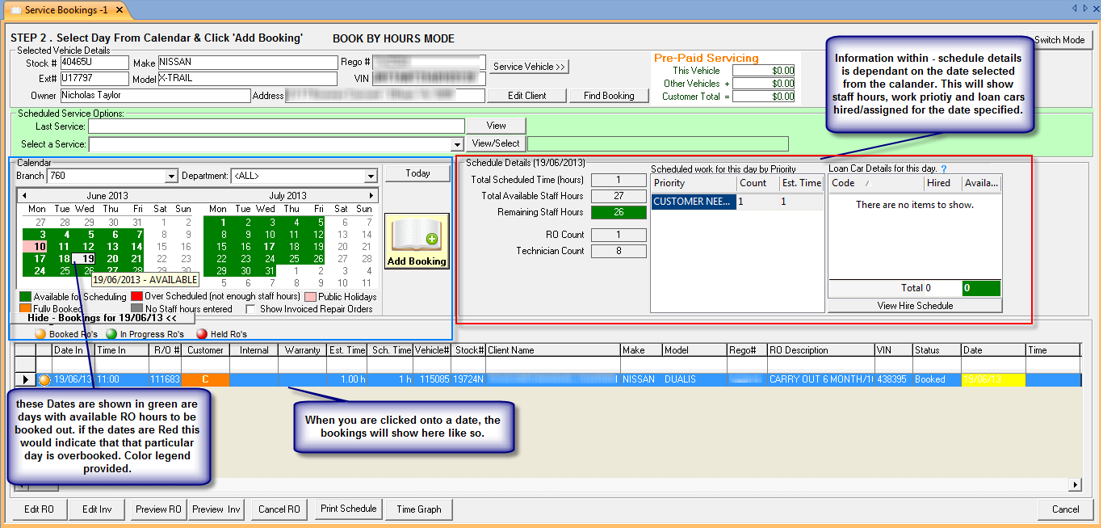
Once you have chosen the day you wish to book the customer in on click on it in the date screen and then click the button in the middle of the screen “Add Booking” button. This will then take you to create a Repair order screen.
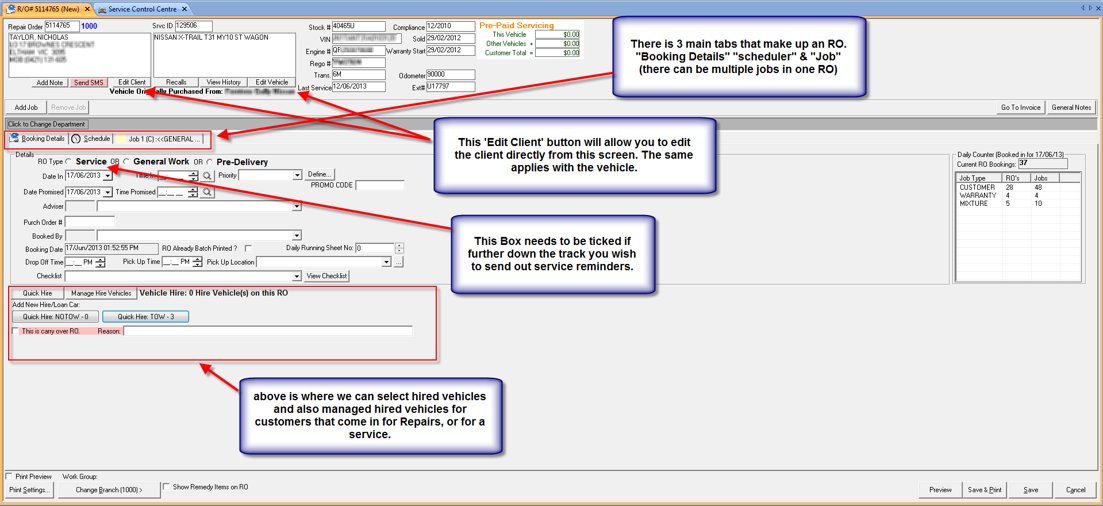
You can then fill in the relevant fields such as Adviser time in etc. Then you will need to add details as to why you are seeing the vehicle. To do this you need to click on the Job 1 tab, this screen is shown below.
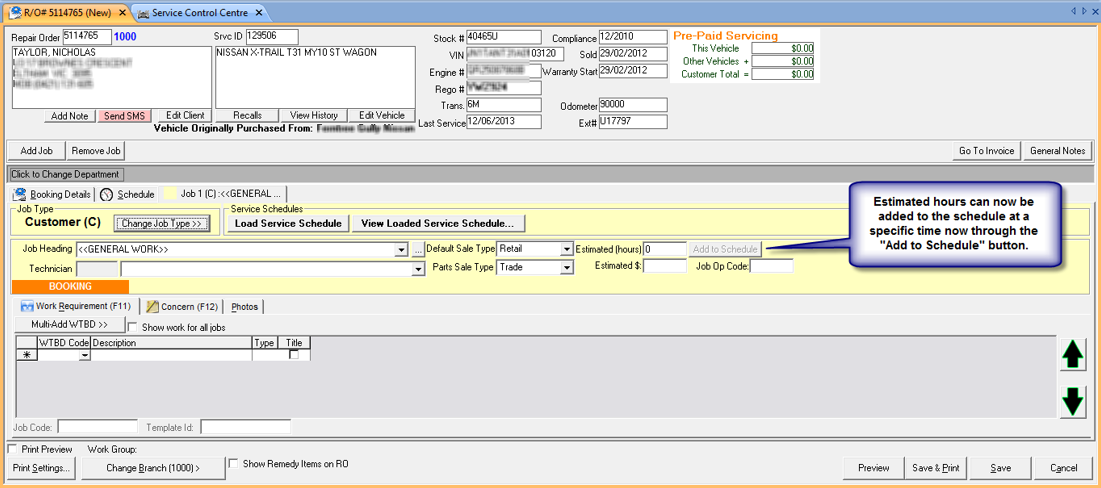
Below the buttons will be listed with the purpose. If there are multiple things you need to do to the Vehicle, you can add multiple jobs.
Add Job | This will add another job to the repair order |
Remove Job | This will delete the current job you have selected |
Change Job Type | This will change the sale type of the repair order, (Retail Warranty Internal) |
Load Service Schedule | This will load a service ‘template’ to the job e.g. 10 000km Service Template |
View Loaded Service Schedule | This will show you the service ‘template’ that you have selected and added to the current job |
Job Description | This field now allows you to save common descriptions you use lots of the time. |
Button with 3 dots ... | This button is a Code Maintenance where you can add the descriptions you use all the time |
Default sale type | This gives you a list of the sale types for the relevant job type e.g. customer with sale type of trade |
Parts sale type | This gives you a list of the sale types for the relevant job type e.g. customer with sale type of trade |