Importing and using Time & Attendance Data
Requires Eclipse Payroll v10.3 +
You must also be using the Eclipse Staff Time & Attendance Feature in the Eclipse Accounting and/or Service Applications to track your Employee's time at work.
Introduction
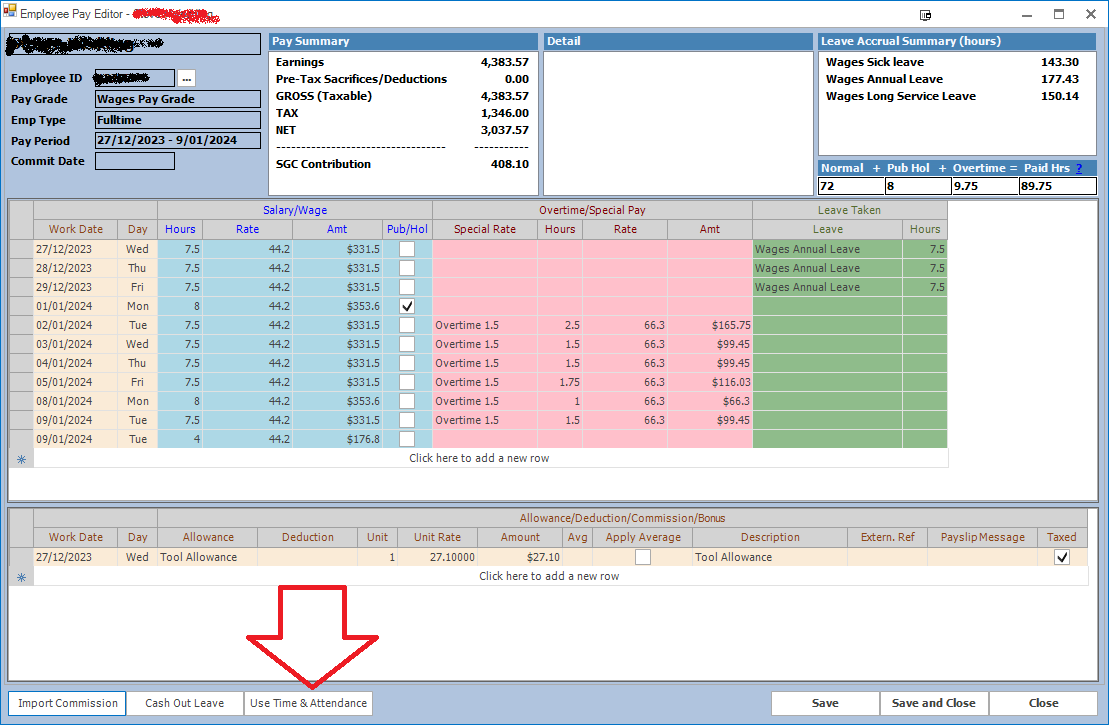
If you are using the Staff Time & Attendance Tracking feature in the Eclipse Accounting and/or Service Applications, you can import the Timekeeping data captured by it into Eclipse Payroll for the purposes of using that data to pay Employees. This ability is provided in the Payrun function in the Pay Editor screen by selecting the Use Time & Attendance command as shown below.
Import Methods
Two methods are available to you when importing Time & Attendance data into Eclipse Payroll.
Basic Import Method
This is the default and in this mode you can only manipulate the break time accorded to a particular Day of work and how much worktime is to be treated as Overtime. You cannot alter the total hours of worktime or any other aspects of the imported data. When the data is imported, all existing worktime data is removed from the grid first.
The Time & Attendance Import Screen looks like the following when in Basic mode.
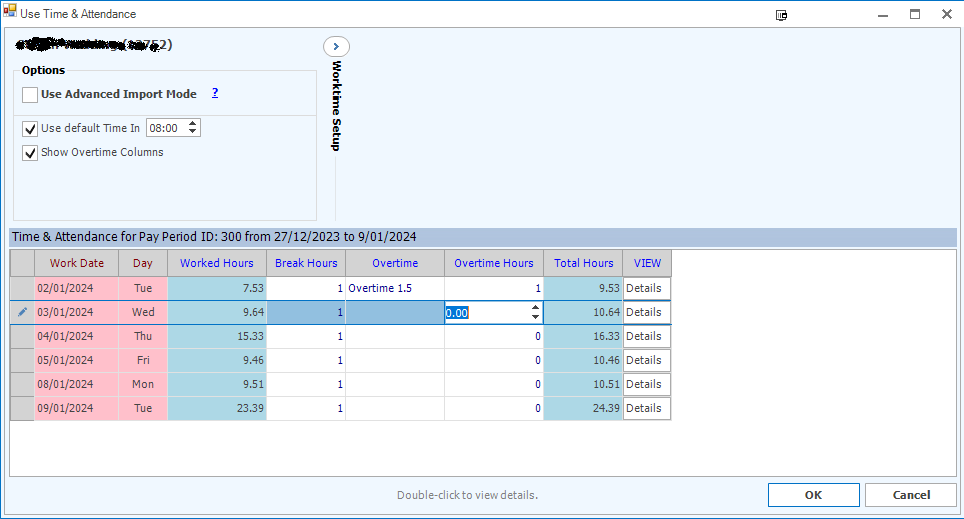
When in Basic mode you can edit any of the fields with a white background in the grid. This allows you to manipulate the Break length and Overtime split. Note that you cannot alter the total length of the shift itself. Note also that when you select Ok your time keeping data will be used to REPLACE ALL worktime data already in the Pay Editor grid.
If you have Time & Attendance data for Salaried Employees (that is, their Pay Grade is of type Salaried), then note that this data is Read-Only and cannot be used to populate the Pay Editor grid).
Advanced Import Method
The Advanced import Method allows for greater control over the way Time & Attendance data is used in Payroll when imported. This mode also provides a function for automatically calculating the amount of Normal Time and Overtime payable for the Timekeeping data being imported.
You can switch between these modes in the Import screen.
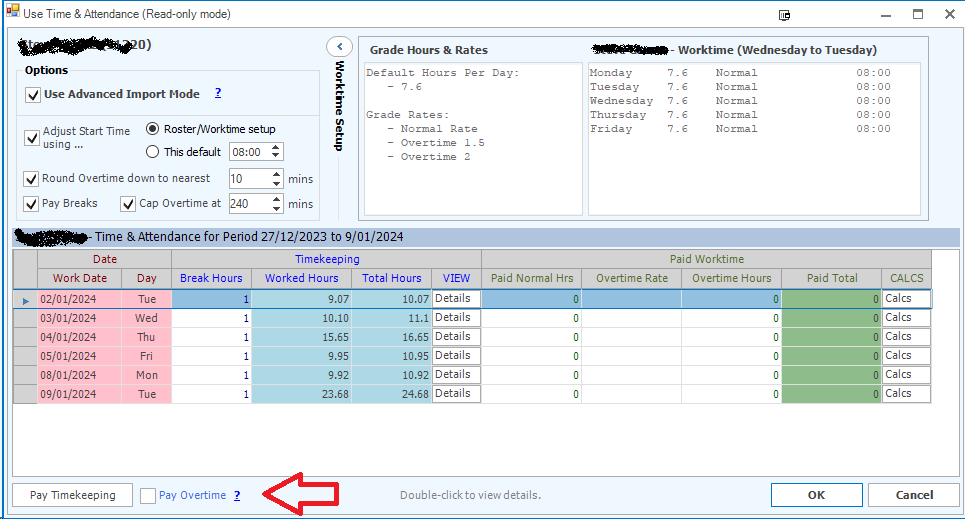
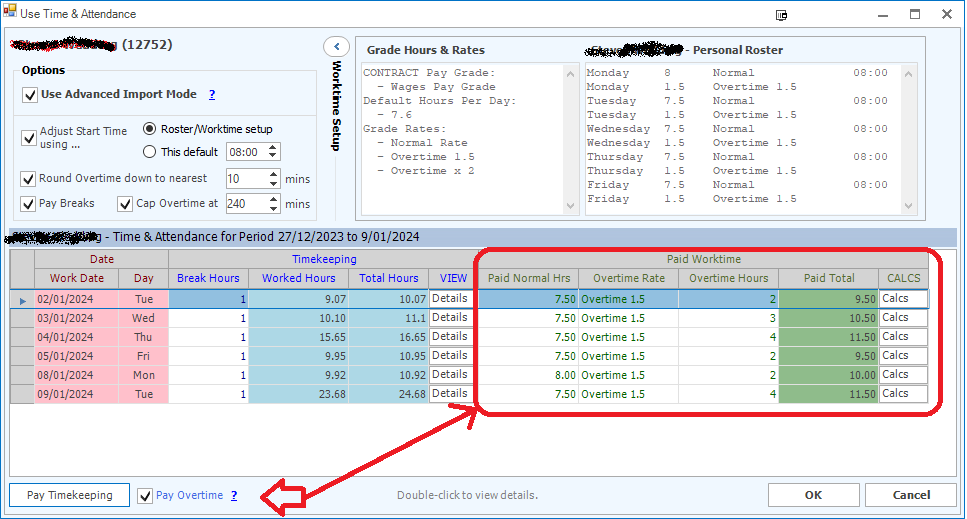
When in Advanced Mode the Import Time & Attendance screen look as follows:
Pay Timekeeping
Note that in Advanced mode a function is available to automatically calculate the Normal and Overtime amounts of time represented in the Timekeeping data. The function is indicated in the screen shot above. Selecting this function will automatically populate the Paid Worktime columns in the grid for each shift. You can alter the calculations manually if required. Note that the way the function processes each shift is determined by the Options, as follows.
Advanced Mode - Pay Timekeeping Settings
- Adjust Start Time using...
This option allows you to truncate any recorded time prior to the Start of the shift so that it is not paid. You can either use the Employee's Personal Roster settings or the Default value shown.
- Round overtime down to nearest x minutes.
This option will cause any Overtime amount to be rounded down to the nearest number of minutes specified. For example, if you set this at 30 minutes and the person has done 1 hour and 45 minutes of OT then this will be rounded down to 1 hour and 30 minutes total.
- Pay Breaks
This option will cause Break time to be treated as paid worktime.
- Cap Overtime at x minutes
The maximum Overtime payable on a shift will be capped at this amount of time. This is useful for preventing too much OT being calculated should the employee fail to clock off.
- Pay Overtime
Check this option to calculate Overtime in the Timekeeping data. Note that by default this is checked for wage based employees and is unchecked if the Employee is Salaried.
In the screenshot below we have run the Pay Timekeeping function and this has populated the grid with the Normal to Overtime splits calculated. You can change this data by manipulating the grid cells with a white background. You can also delete rows. You must populate the green columns in the grid in order to import that Timekeeping data.
The Employee's Grade Hours, Rates of Pay and Roster are shown at the top of the screen for quick reference.
Confirming Timekeeping Changes
After manipulating the Timekeeping data in the Use Time & Attendance screen and then pressing Ok note that the following screen is presented. This screen allows you to indicate how you want to import the Timekeeping data and it also provides an overview of how the Pay Editor grid will change when you do this. Note also that this screen allows you to determine how the Timekeeping data differs from whatever is in the Pay Editor grid now.
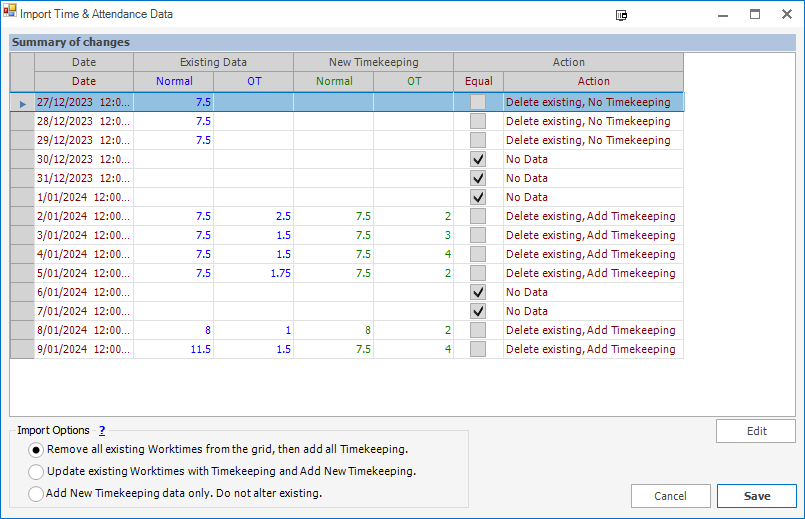
Choose the Import Option you wish to use and then press Save to add the Timekeeping to the Pay Editor grid.
If you choose the Edit button you will be returned to the Use Time & Attendance screen.
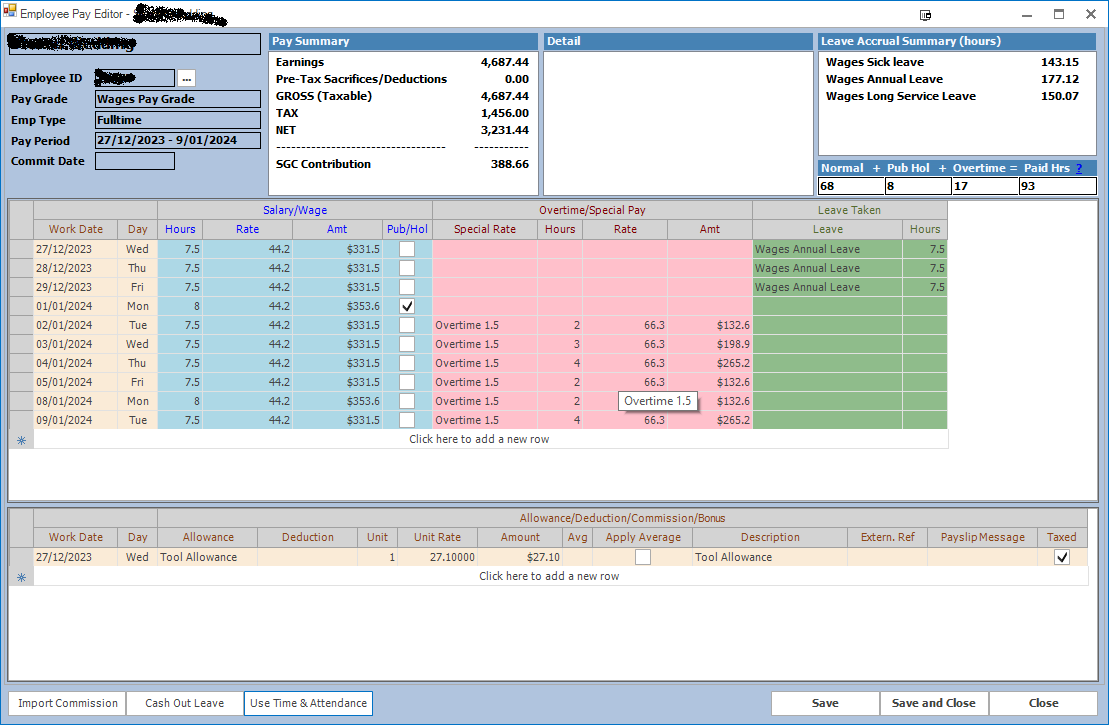
After importing this the Grid will be populated with the changes as per below.
Note regarding Salaried Employees
Be aware that you can manipulate and import the Timekeeping data for Employees attached to a Salaried Pay Grade when in the Advance mode. However you should note that typically Salaried employees are paid from their planned roster not from Time & Attendance data. Also Salaried Employees typically are not paid for overtime worked. You will receive warnings if you try to use Timekeeping data to pay Salaried Employees.
System Options
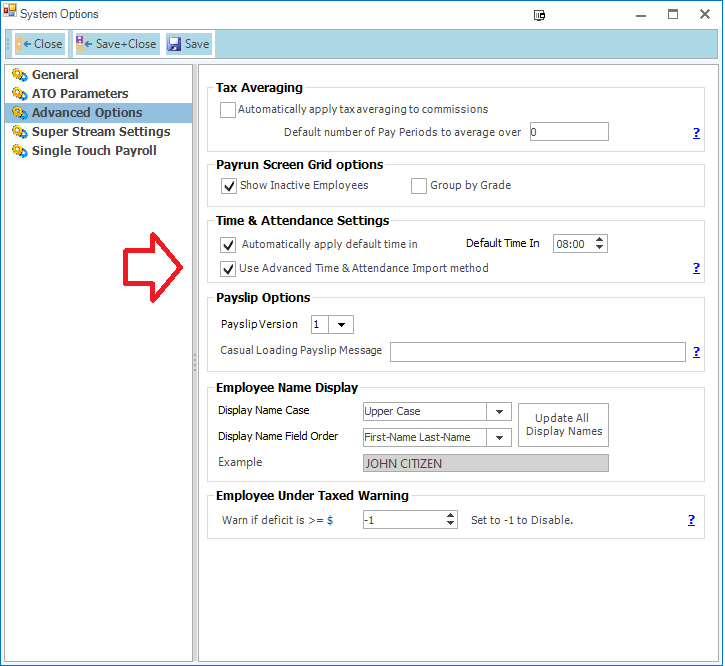
You can change whether the System uses the Basic or Advanced Import mode by default using the System Options screen as shown below.
Note that the default Start Time for the business can also be managed here.
Personalised Start Time
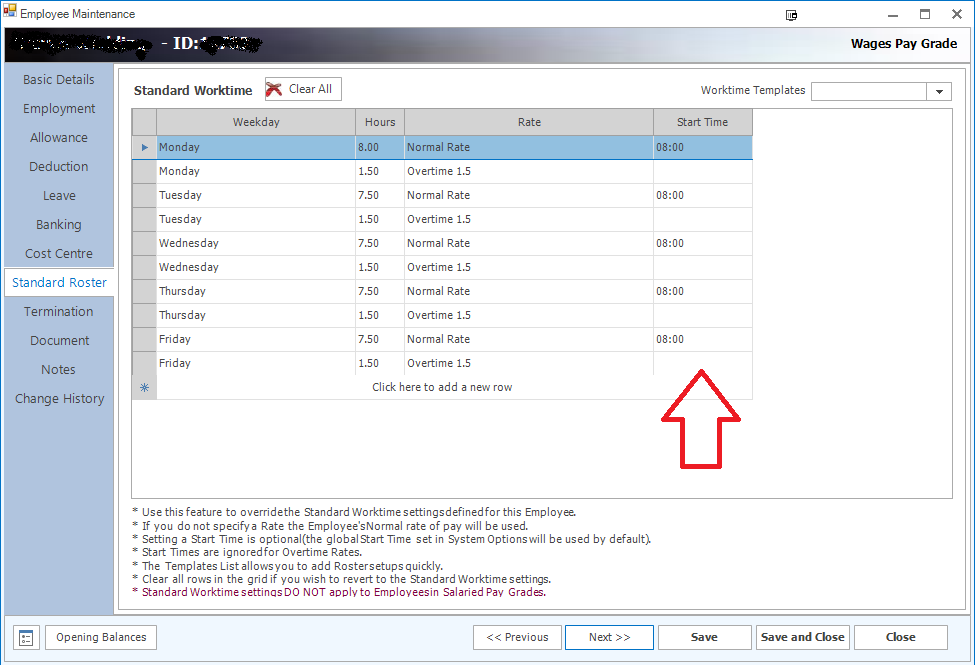
By default the system will use the Default Start Time shown in System Options for all Employees. This can be customised per Employee by creating a Standard Roster for them in their Employee setup, as shown below:
